 To begin, you'll need a few tools. I use regular aluminum foil as my surface cover (very low-tech here!). You'll also need a VersaMark watermark pad, a heat gun, tweezers, and the UTEE. I'm embossing cardstock letters here, but you are certainly not limited to either letters or cardstock!
 To begin, press your letters (right side down) until they are covered with the watermark ink. If you've never worked with watermark ink before, it's supposed to be clear.
 Liberally pour the UTEE on the newly inked letter.
 Once your letter is completely covered with the powder, lift out of the pile. Leave the rest there - you'll need it in a minute.
 I tap my letter to get any loose pieces of powder off.
 Now comes the fun part! Heat up your letter with a heat gun.
  As it's heating, you'll notice your powder changes to a gloss.
After you're finished with your first round of embossing, the surface will be textured. It's hard to see in the picture, but instead of being smooth, it has slight bumps and ridges. If you like the texture, you can stop now. Otherwise, you'll repeat the process.

For this part, you need to work fast. While the UTEE is still hot, you want to re-dip your letter into the leftover pile of powder. If your surface doesn't pick up any new powder, it's too dry. To remedy that, just re-heat with the heat gun.

Again, heat up the powder with your heat gun. Many times it takes on a smooth finish after the second round of embossing, but sometimes you will need to complete the steps a third time.

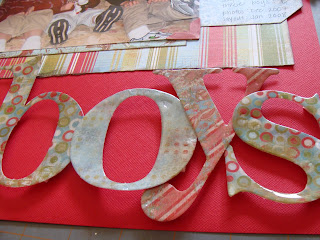
Allow to dry, and your letter is ready to use! The next two pictures show the glossy surface that is created.


The wonderful thing about working with UTEE is that it is very forgiving. If you get an air bubble, just apply the heat gun and work it out. Once the letter is dry, you can actually crack the surface (if you're going for a distressed look). If your letter cracks by accident, just re-apply the heat.
Here is a close-up of my finished project:

5 comments:
Looks good Dawn!
dawn this is a great tutorial...UTEE is a blast to work with especiall on chipboard!!!
thanks so much for sharing! Great layout and tutorial!
really enjoyed that tutorial... and yes i have the supplies.. and no i don't use them. for the very reasons you mentioned. i will be getting them out now! thanks for sharing this!
Thanks for sharing the tutorial Dawn....that was great and it actually made me want to do it again....it has been a long time since I have dug those supplies out!
Post a Comment